Manage HLA antibody information
Intended audience: hla technologist
HLA antibody results show the antibodies found in a recipient’s serum test that could cause an adverse reaction to donor organs.
Antibody tests are performed on recipients on the waitlist on a regular basis. Each recipient's current test, as well as their full history of cumulative antibody results, can affect cPRA and virtual crossmatch results.
Adding antibody results – SAB (Single Antigen Bead) testing method
If you used more than one method for the sample, select any method other than Storage; you can then select different testing method details for Class I and Class II separately.
-
Go to the recipient’s profile, then select HLA Information > Antibodies on the sidebar.

Select the Create HLA Antibodies Test button.
-
In the New HLA Antibodies Test fields:
Enter the Sample Code and Sample Draw Date.
Select SAB from the Testing Method dropdown.
-
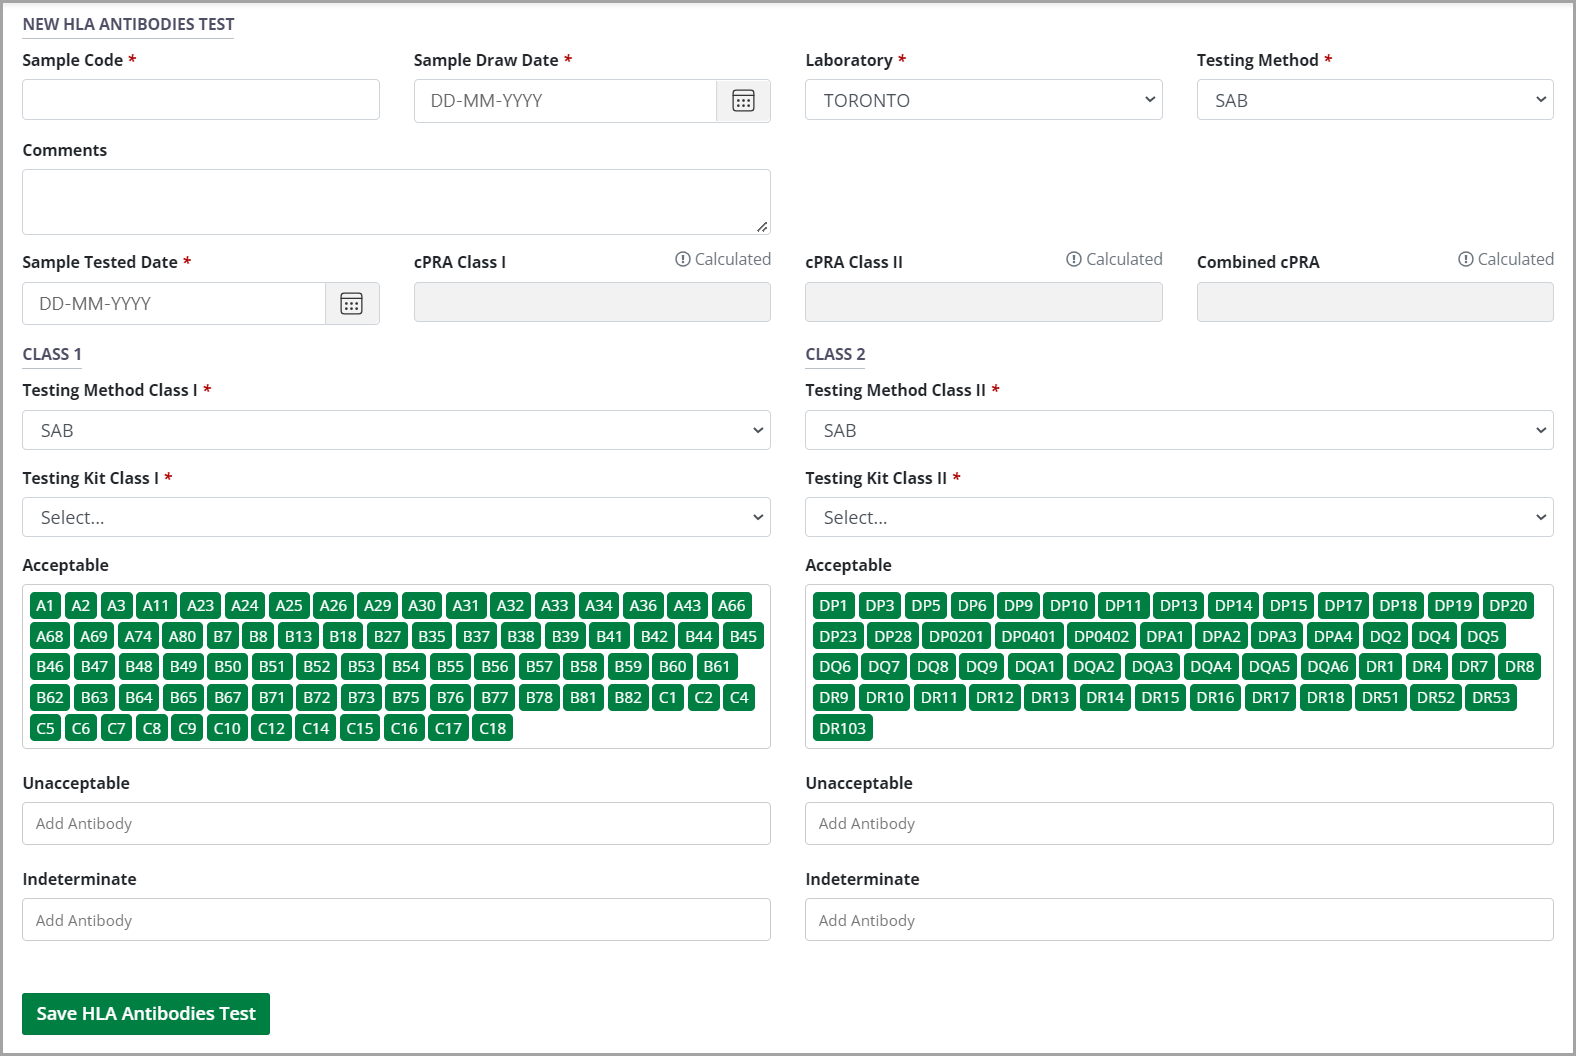
The system presents the SAB interface, listing all of the antibodies that can be included in your test results, divided into Class I and Class II antibodies.

-
Select the HLA Lab where the sample was tested, and enter the testing date (defaulted to today’s date) and any comments about the test results.
If you are associated with an HLA lab, the HLA Lab value is populated automatically with your lab.
-
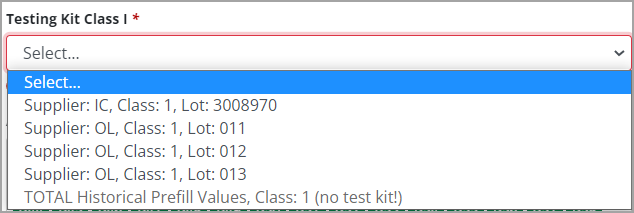
Select the Testing Kit that was used to test the serum.

Each test kit covers different antibodies. The system automatically populates the Acceptable list with all of the antibodies that the testing kit covers.
Testing Kits will automatically default to the most recently uploaded test kit in OATS for each Class I and Class II and can be modified as needed.
-
Enter antibodies found in the recipient’s serum in the Unacceptable or Indeterminate fields by typing the antibody in any HLA format.
When you enter an antibody as Unacceptable or Indeterminate, it disappears from the Acceptable list.
You can enter a list of antibodies with spaces between them – for example, you can copy antibodies from your laboratory information system output, and paste them into the Unacceptable field.
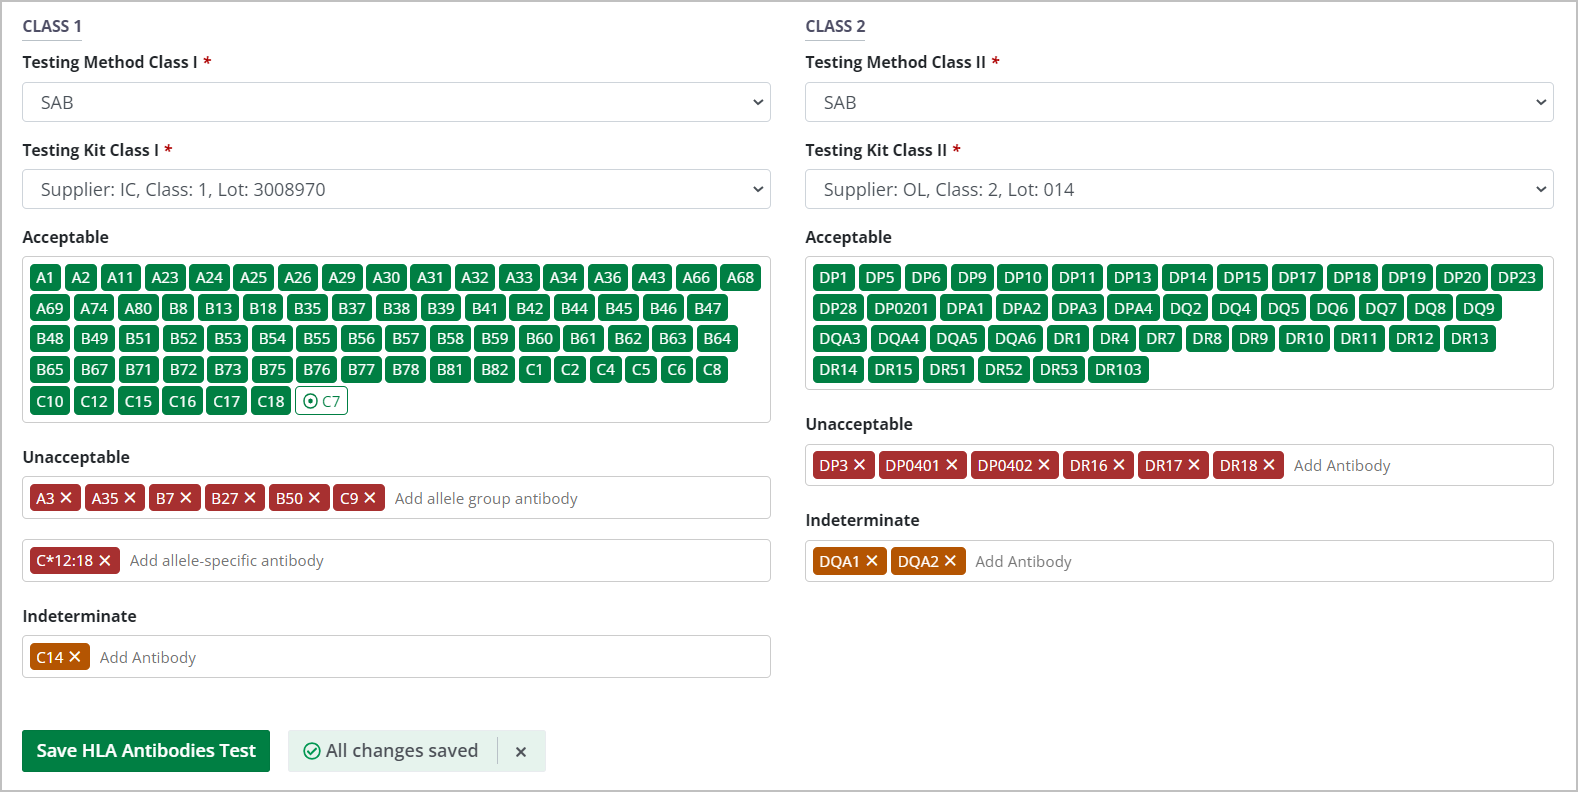
Enter allele group antibodies by entering the locus and a single quartile. Allele group antibodies are automatically standardized to serological format (e.g., A3).
-
Enter allele-specific antibodies by entering the locus and multiple quartiles. You can separate the antibody and allele with a colon, but punctuation is not necessary. Allele-specific antibodies are automatically standardized to molecular format and listed separately from the group-level antibodies (e.g., C*12:18).

-
Note that when you enter an allele-specific antibody, the allele group will remain in the Acceptable list, but marked with a target icon and differentiated by colour:

-
-
Enter alpha-beta Class II antibodies by entering the alpha allele, a hyphen, and the beta allele (e.g. DQA6-DQ2). Alpha-beta antibodies are automatically standardized to molecular format and listed separately from the other antibodies (e.g. DQA1*06-DQB1*02).
-
Note that when you enter an alpha-beta antibody, the allele groups are marked with chain icons, and differentiated by colour.

If you tested Class I and Class II with two different testing methods, update the testing method for either class as needed. The interface for that class changes to the interface for the selected method.
-
-
When you have completed entering the antibody results, select the Save HLA Antibodies Test button.
To cancel, select the return to previous page icon or browse to any other page without saving. Any unsaved information is discarded.
The recipient’s cPRA values update automatically for the SAB results you entered, and the test results are added to the recipient’s antibody testing history.
The cPRA value is presented on the recipient’s profile, in the General Clinical Data section.
Testing kits (mentioned in step 6) help determine untested values during a virtual cross match. New testing kits easily be added to OATS, so contact TGLN if you receive a new kit or lot from your supplier.
Adding antibody results – ID/PRA (Panel Reactive Antibody) testing method
If you used more than one method for the sample, select any method other than Storage – you can update the testing method information later.
The following business rules will be applied when uploading HLA antibody test results for Class I and Class II to CTR as follows:
A. All ID/PRA testing methods are being uploaded to CTR with the serum confirmed flag = yes by default
B. If a sample where at least one of the Class I and Class II Antibody test type = storage, then that test must not be uploaded to CTR
C. When multiple HLA antibody test results are sent to CTR for a recipient at the same time (e.g., when they are initially listed), OATS will send them in chronological order by serum sample date
-
Go to the recipient’s profile, then select HLA Information > Antibodies on the sidebar.

Select the Create HLA Antibodies Test button.
-
In the New HLA Antibodies Test fields:
Enter the Sample Code and Sample Draw Date.
Select ID/PRA from the Testing Method dropdown.
-
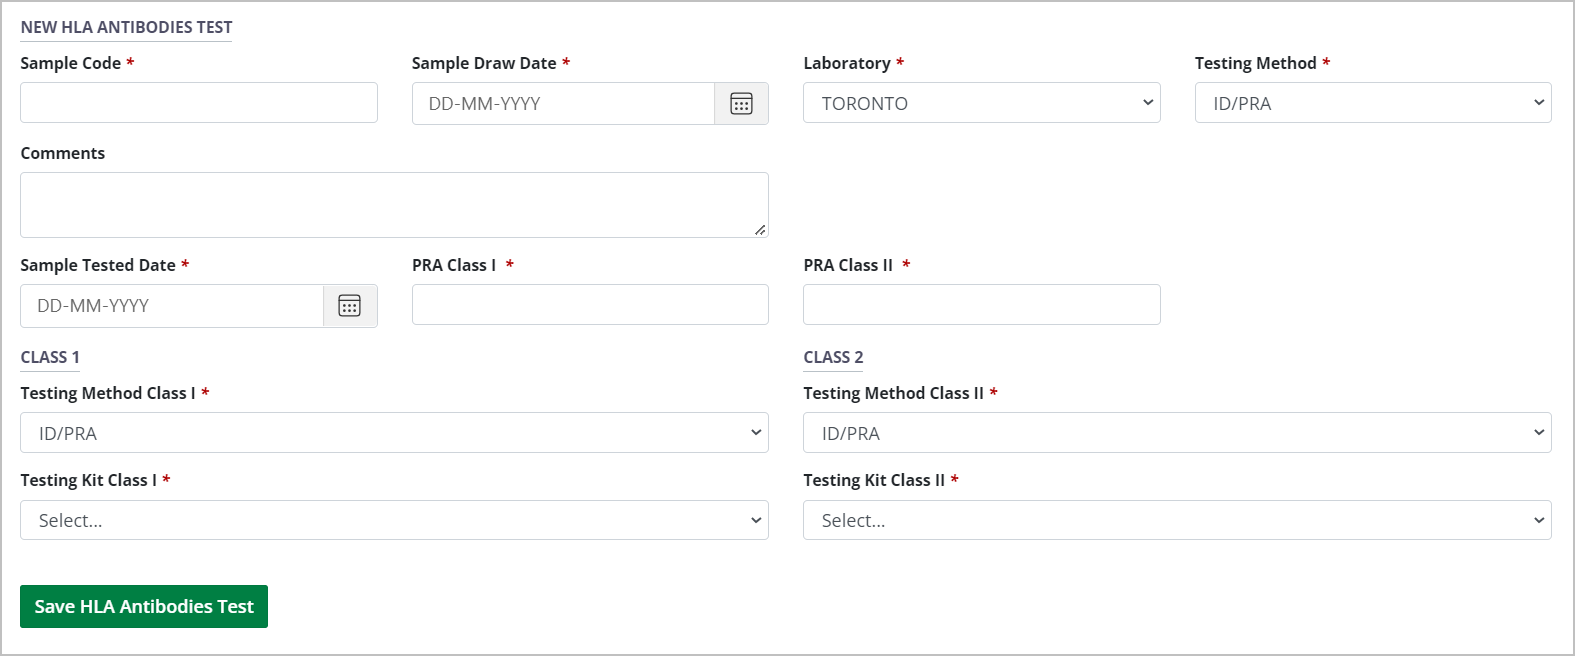
The system presents the ID/PRA interface.

-
Select the HLA Lab where the sample was tested, and enter the testing date (defaulted to today’s date) and any comments about the test results.
If you are associated with an HLA lab, the HLA Lab value is populated automatically with your lab.
Enter the PRA values you obtained from the ID/PRA test, including Class I PRA, Class II PRA, and Combined PRA.
-
Select the Save HLA Antibodies Test button.
To cancel, select the return to previous page icon or browse to any other page without saving. Any unsaved information is discarded.
Adding antibody results – Storage testing method
If you used more than one method for the sample, select any method other than Storage – you can update the testing method information later.
-
Go to the recipient’s profile, then select HLA Information > Antibodies on the sidebar.

Select the Create HLA Antibodies Test button.
-
In the New HLA Antibodies Test fields:
Enter the Sample Code and Sample Draw Date.
Select Storage from the Testing Method dropdown.
-
Select the Save HLA Antibodies Test button.
To cancel, select the return to previous page icon or browse to any other page without saving. Any unsaved information is discarded.
When you select the Storage testing method, no additional information is required. However, this selection indicates that a test sample was drawn from the recipient, meaning that the recipient remains eligible for active waitlist status.
Viewing and editing historical antibody results
You can view the details of historical HLA antibody test results, and edit them if they contain erroneous information.
-
Go to the recipient’s profile, then select HLA Information > Antibodies on the sidebar.

Select any entry from the table of historical test results to see its details in the Selected HLA Antibodies Test fields.
View and edit the information as required.
-
Select the Save HLA Antibodies Test button.
To cancel, select the return to previous page icon or browse to any other page without saving. Any unsaved information is discarded.
