Manage donor typing sheet
Intended audience: hla technologist
HLA Technologists can save a digital copy of a donor's typing sheet to the donor’s profile, to be downloaded and viewed at transplant programs when a decision is being made to accept or decline an offered organ.
Before attaching documents, ensure that all identifying information about the donor has been redacted. This can include changing file names and blacking out sections of documents.
Attaching a document
To attach a donor typing sheet to a donor profile:
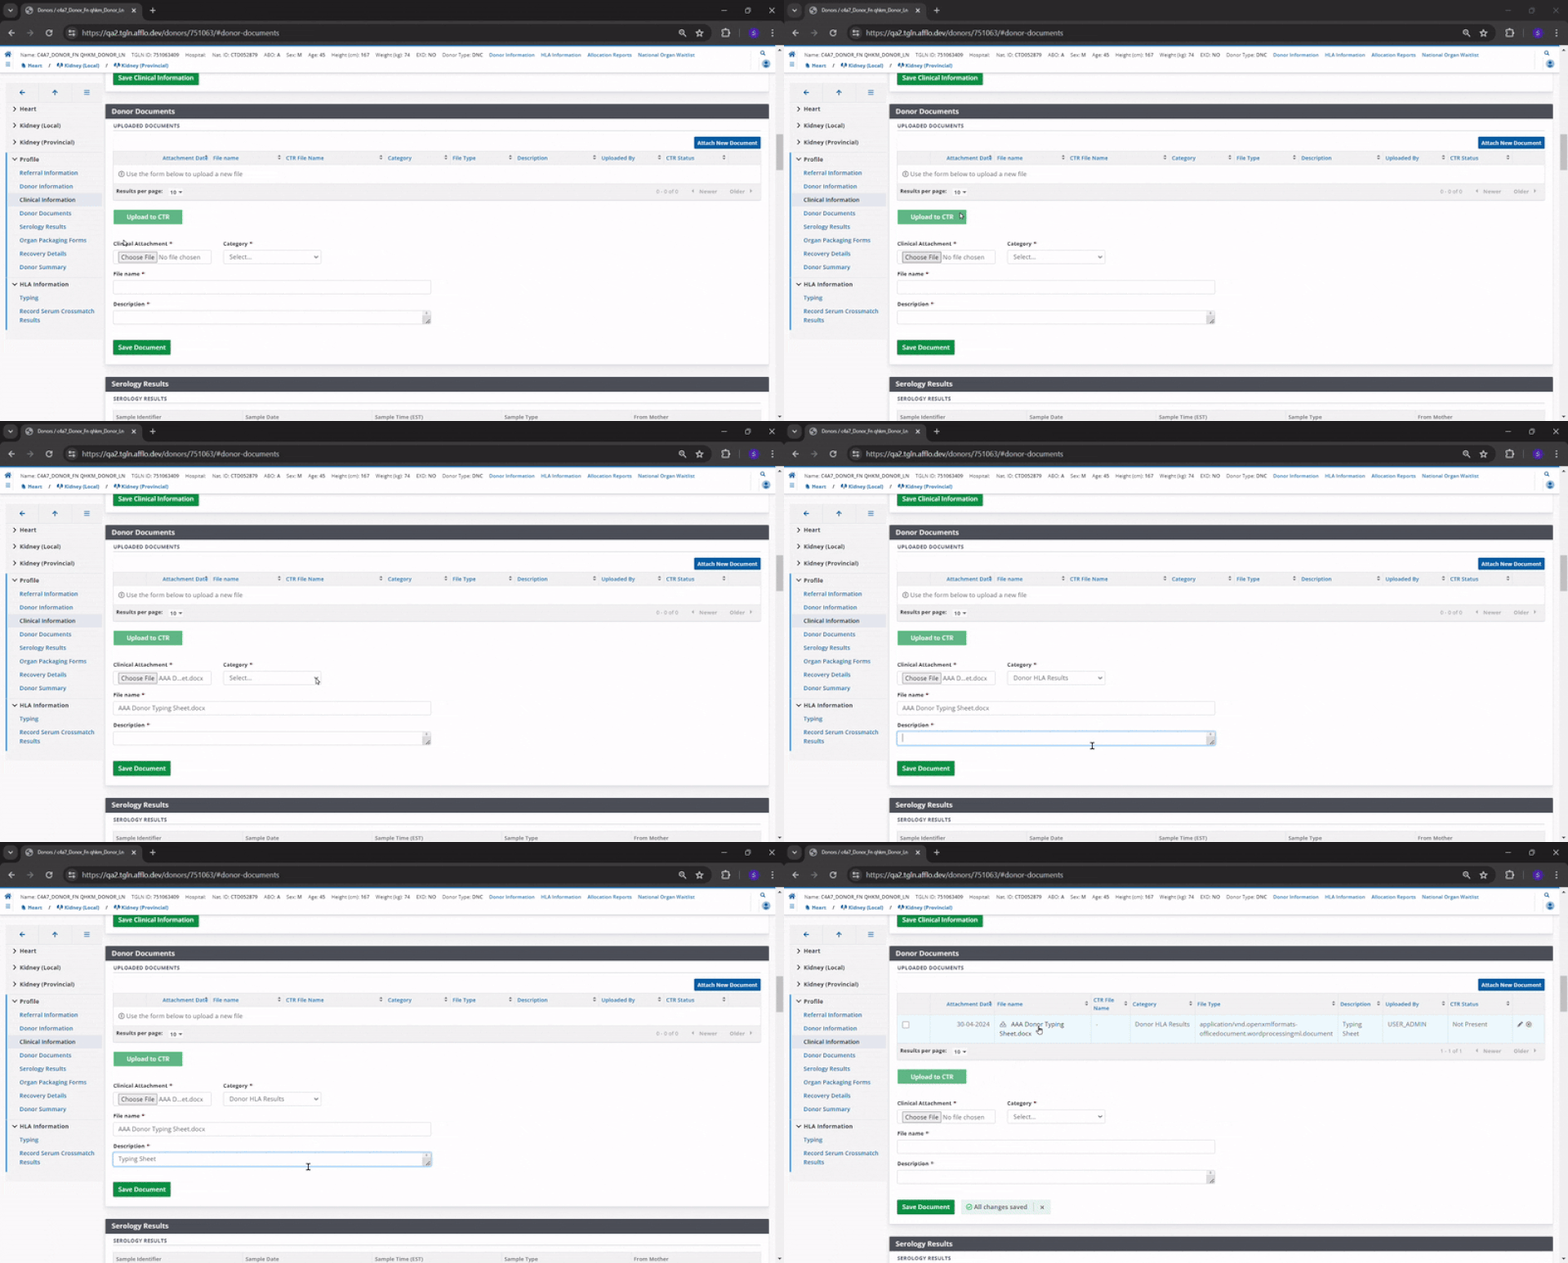
Go to the donor’s profile, then select Profile > Donor Documents on the sidebar on the left side of the page.
Select Attach New Document.
Select the Choose File button displayed in the Clinical Attachment field.
With your browser’s file management tools, find and select a target document.
The selected document’s file name appears under Clinical Attachment and under Filename.
-
Enter document information:
Select a Category from the dropdown of Donor HLA results.
Change the Filename if needed. Be sure the Filename does not include identifying information about the donor.
Enter an optional Description of the file (e.g., “Donor typing sheet”)
Select the Save Document button.

|
The system adds the document as a link in the Uploaded Documents table, along with its Category, Attachment Date, File Name, File Type, Description, and the name of the user who uploaded it.
Authorized users at transplant programs can download the document.
Editing document details
To change the information about attached documents:
-
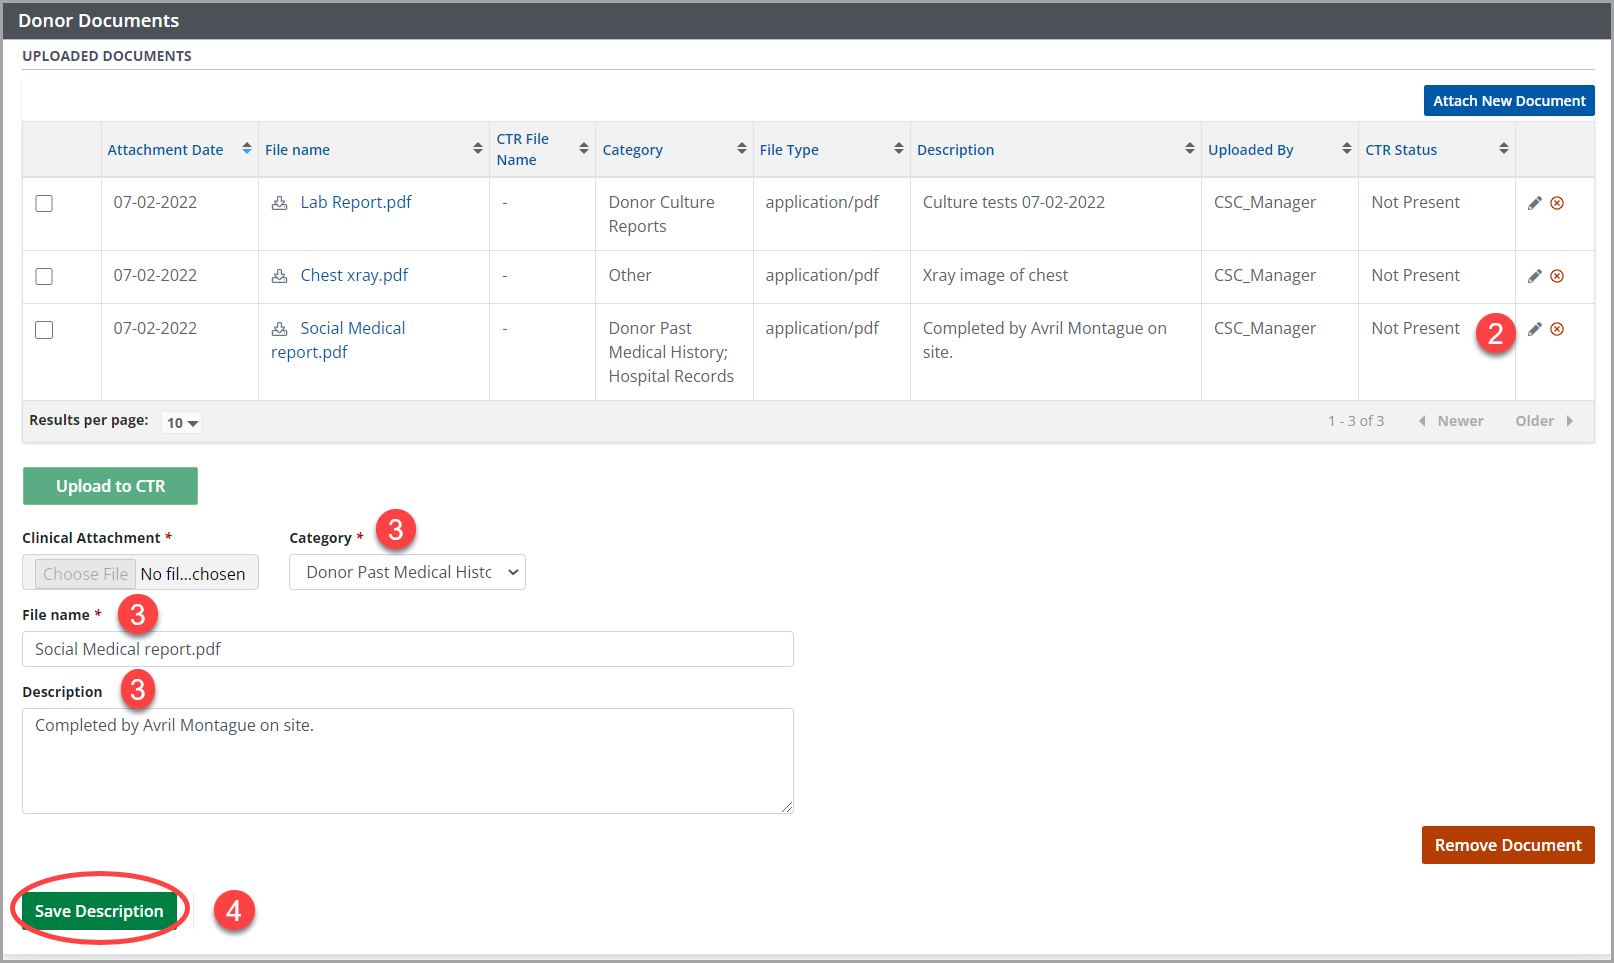
Go to the donor profile, then select Profile > Donor Documents on the sidebar.

In the Uploaded Documents table, in the row of the document to be edited, select the edit icon (small pencil).
Edit the document’s information as required.
Select Save Description.
The system updates the selected document’s details in the Uploaded Documents table.
Removing a document
-
Go to the donor profile, then select Profile > Donor Documents on the sidebar.

In the Uploaded Documents table, in the row of the document to be removed, select the delete icon (small red x).
-
The system prompts you to confirm the deletion.
Select:OK to continue.
Cancel to return to the previous step.
The system removes the document from the Uploaded Documents table.
The document can be recovered, if necessary, by submitting a service request to the system administrator.
