Make and accept eOffers for a living donation
Intended audience: clinical services coord - csc
For Release 1 of OATS, a CSC will manage the process of offering and accepting a living donor’s non-directed organ donation.
Prerequisites: a living donor allocation recommendation has been run and a pre-allocation checklist has been completed by two CSCs.
Offering a living donor organ
Go to the living donor’s profile (as per Navigate the Living Donor List), then select Organ > Allocation/eOffer for the consented organ on the left side of the page.
-
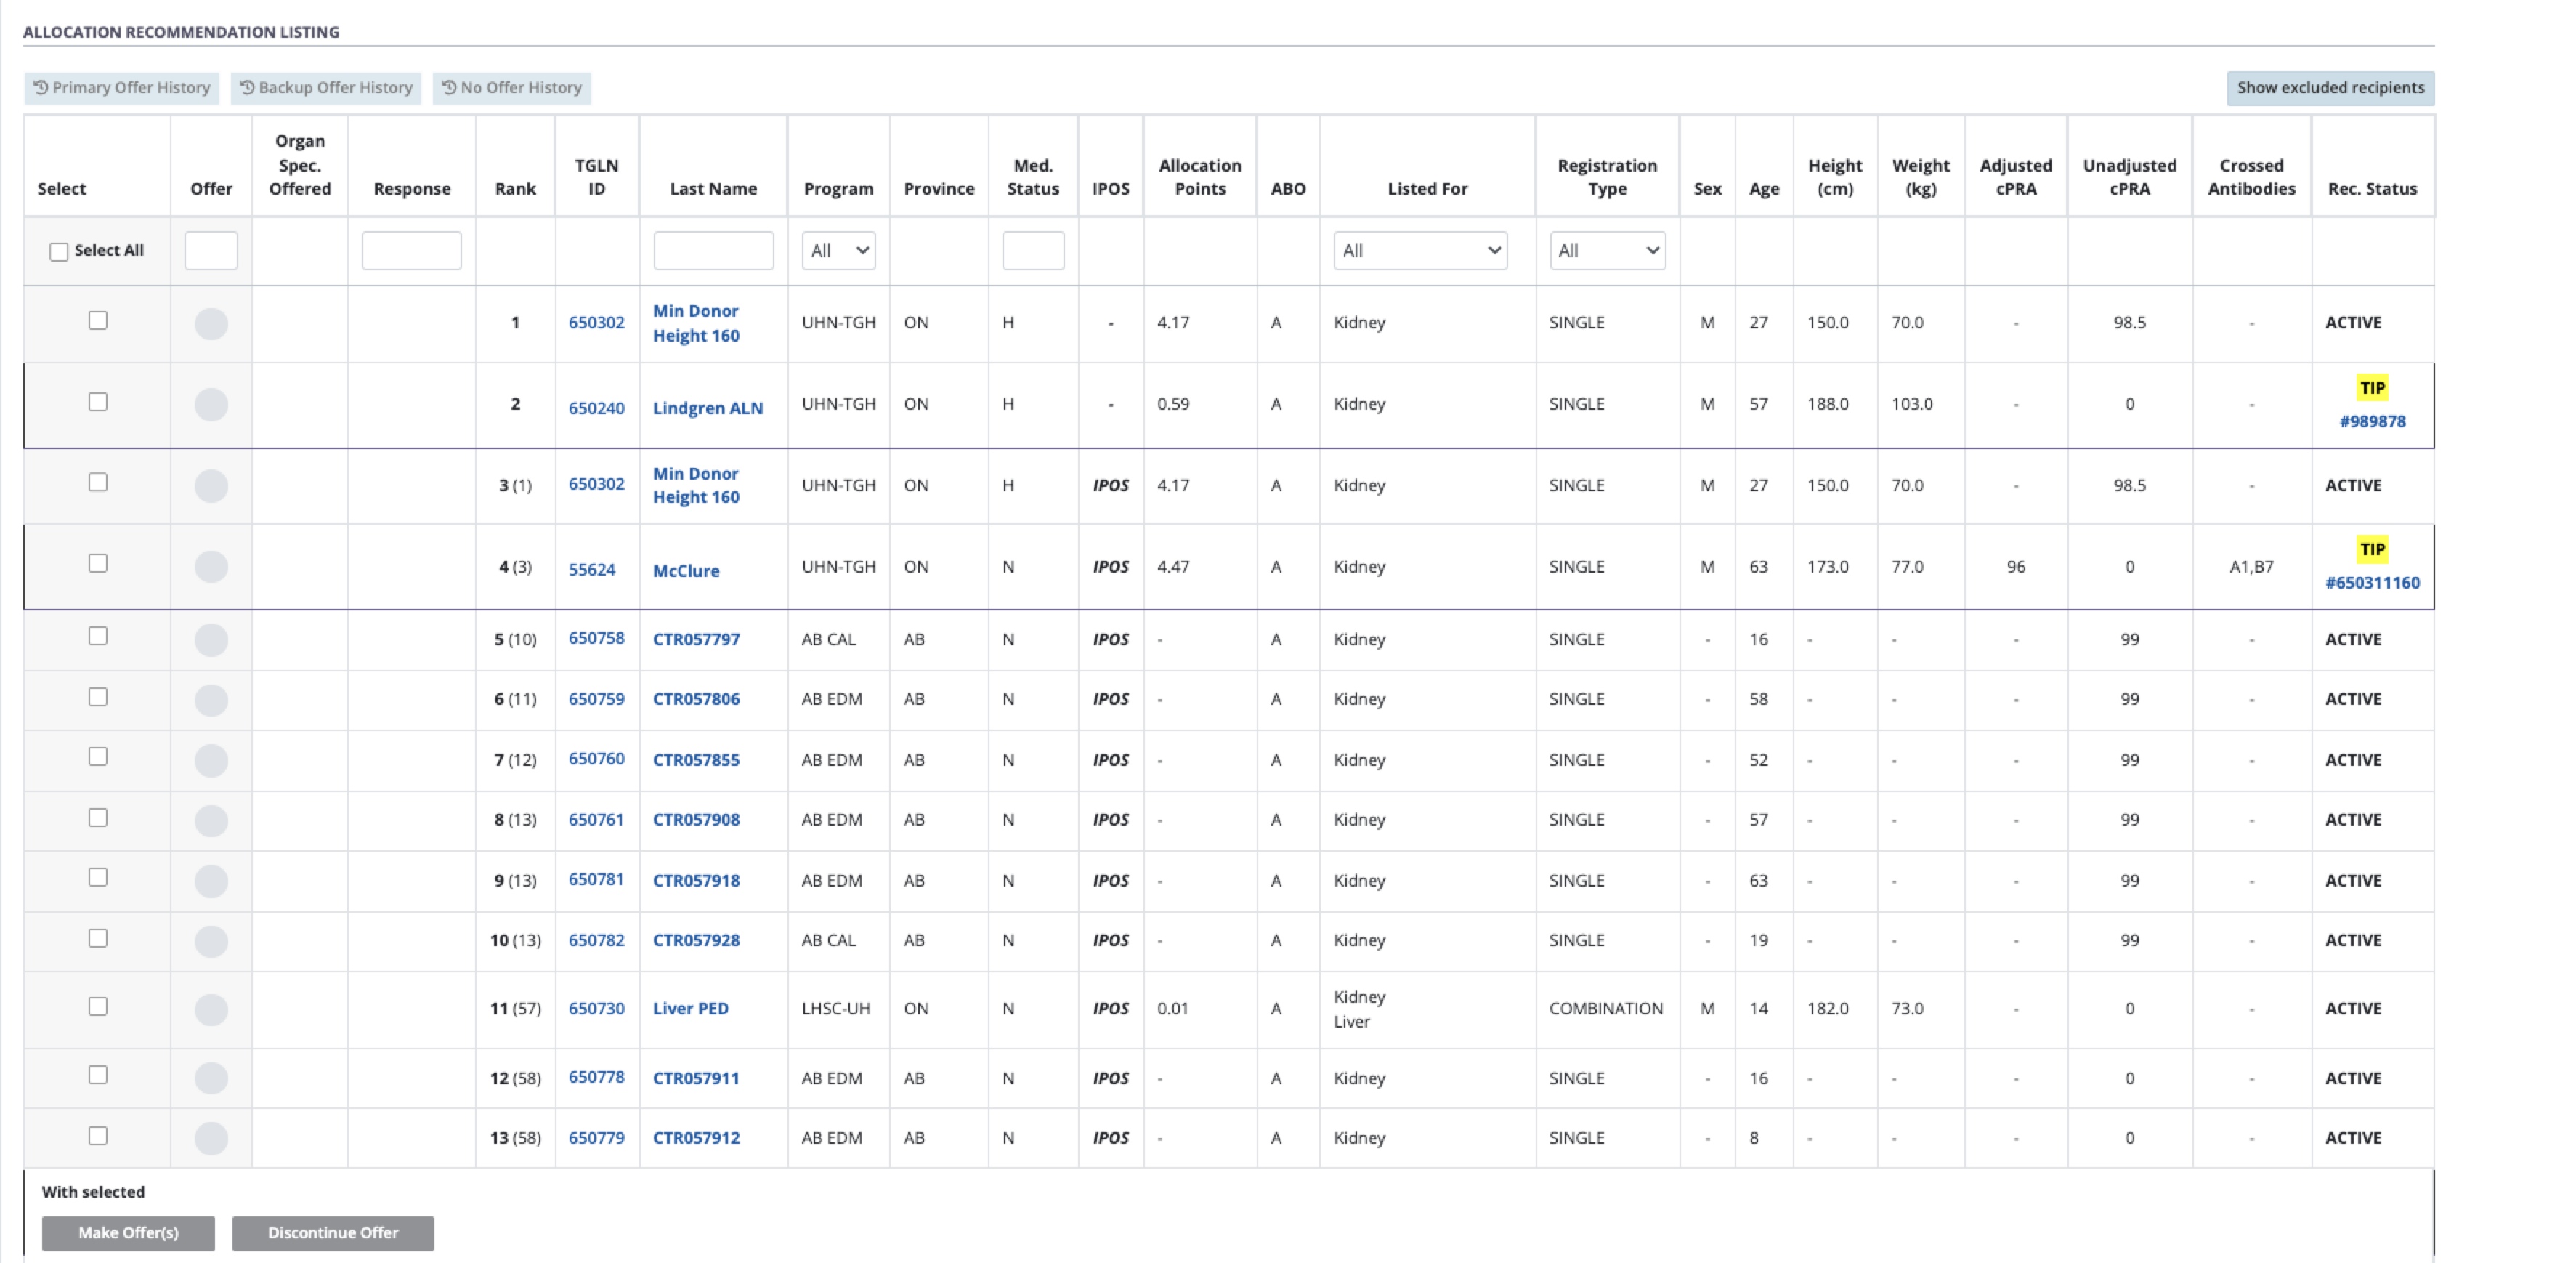
Scroll to the Allocation Recommendation Listing.

Click the Select All box to activate all rows in the table.
-
Select the Make Offer(s) button at he bottom of the allocation recommendation list.
This button is inactive until a pre-allocation checklist has been completed by two CSCs.
-
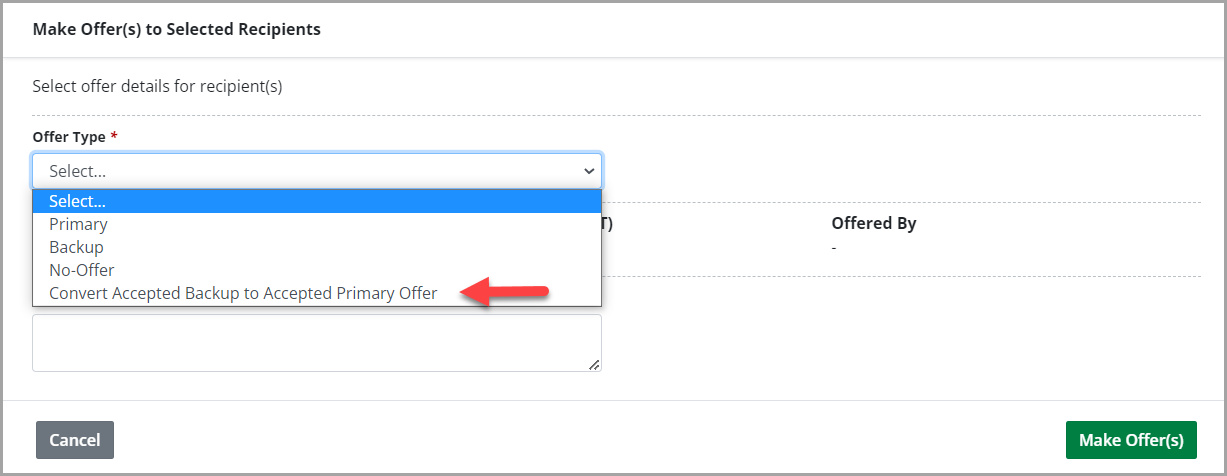
In the Make Offer(s) to Selected Recipients window that appears, enter the following information:

Select Backup from the Offer Type dropdown list.
-
Enter comments in the Offer Comment field.
Use this to highlight important offer information.
Do not include identifying information about the living donor.
-
Select the Make Offer(s) button.
To close the window without making an offer, select the Cancel button or the X on the upper right corner.
The system sends the transplant program a notification about the backup offers.
Accepting a living donor backup offer
Prerequisite. The transplant program has confirmed the intended recipient and has notified PRC of the recipient.
Responses to offers must be processed in the order they appear. You will have to decline any offers that appear ahead of the intended recipient and then accept the offer for the intended recipient.
Go to the living donor’s profile, then select Organ > Allocation/eOffer on the sidebar for the consented organ.
Scroll to the Offer Responses section.
Locate the recipient confirmed by the transplant program
Select (tick) all recipient offers that are above the intended recipient.
-
Select the Decline Multiple Offers button.

-
In the Discontinue Offer(s) to Selected Recipients window, provide values for
Response type.
Reason Category.
Reason.
-
Select the Discontinue Offers button.
Select Cancel to close the window without declining the offers.
-
In the row with the intended recipient, enter response details:
Select a Response of Accept.
Select a Responsible Physician.
Select the Confirm Changes button at the bottom of the page.
Change living donor backup offer to Primary offer
Go to the living donor’s profile, then select Organ > Allocation/eOffer for the consented organ.
Scroll to the Allocation Recommendation Listing.
Select the recipient confirmed by the transplant program, for whom the backup offer was accepted.
Select Make Offer.
-
In the Make Offer(s) to Selected Recipients window that appears, select Offer Type of Convert Accepted Backup to Accepted Primary Offer.

Select Make Offers.
OATS converts the accepted backup offer of the recipient to an accepted primary offer. The CSC can complete a post allocation checklist.
