Create and view a customized waitlist summary
Intended audience: recipient coordinator transplant physician clinical services coord-csc tgln management transplant user transplant program admin tgln informatics
A customized waitlist provides an overview of the recipients currently waiting for an organ (or organs) in a given transplant program, the status (or statuses) of their transplant journeys.
This article is about the waitlist summary, which provides a summarized version of the larger waitlist report, in an on-screen, tabular format that can be searched, sorted, and filtered.
Transplant program users can only view the waitlist summary and report for recipients registered to their program.
Generating a customized waitlist summary
Select Waitlist from the main menu at the top of the page.
-
Define which recipients are to be included in the summary:

-
Select an Organ to report on.
If the Organ is Liver, Kidney or Lung, select a Preferred Donor Type.
-
Select one or more Transplant Programs (if this option is available to you).
Select the Transplant Program field to see a list of all available programs.
Select an option from the list to add it to the field.
-
To remove a program, select the x on the right side of its name.

-
Select one or more Blood Types.
Select the Blood Type field to see a list of all available programs.
Select an option from the list to add it to the field.
-
To remove a blood type, select the x on the right side of its name.

-
Select whether to include Cluster Recipients, Recipients on Medical Hold, Recipients on Serum Hold, and/or Suspended Recipients.
-
By default, all recipient types are selected for inclusion.

-
-
Select the Generate Custom Report button.
The system presents:
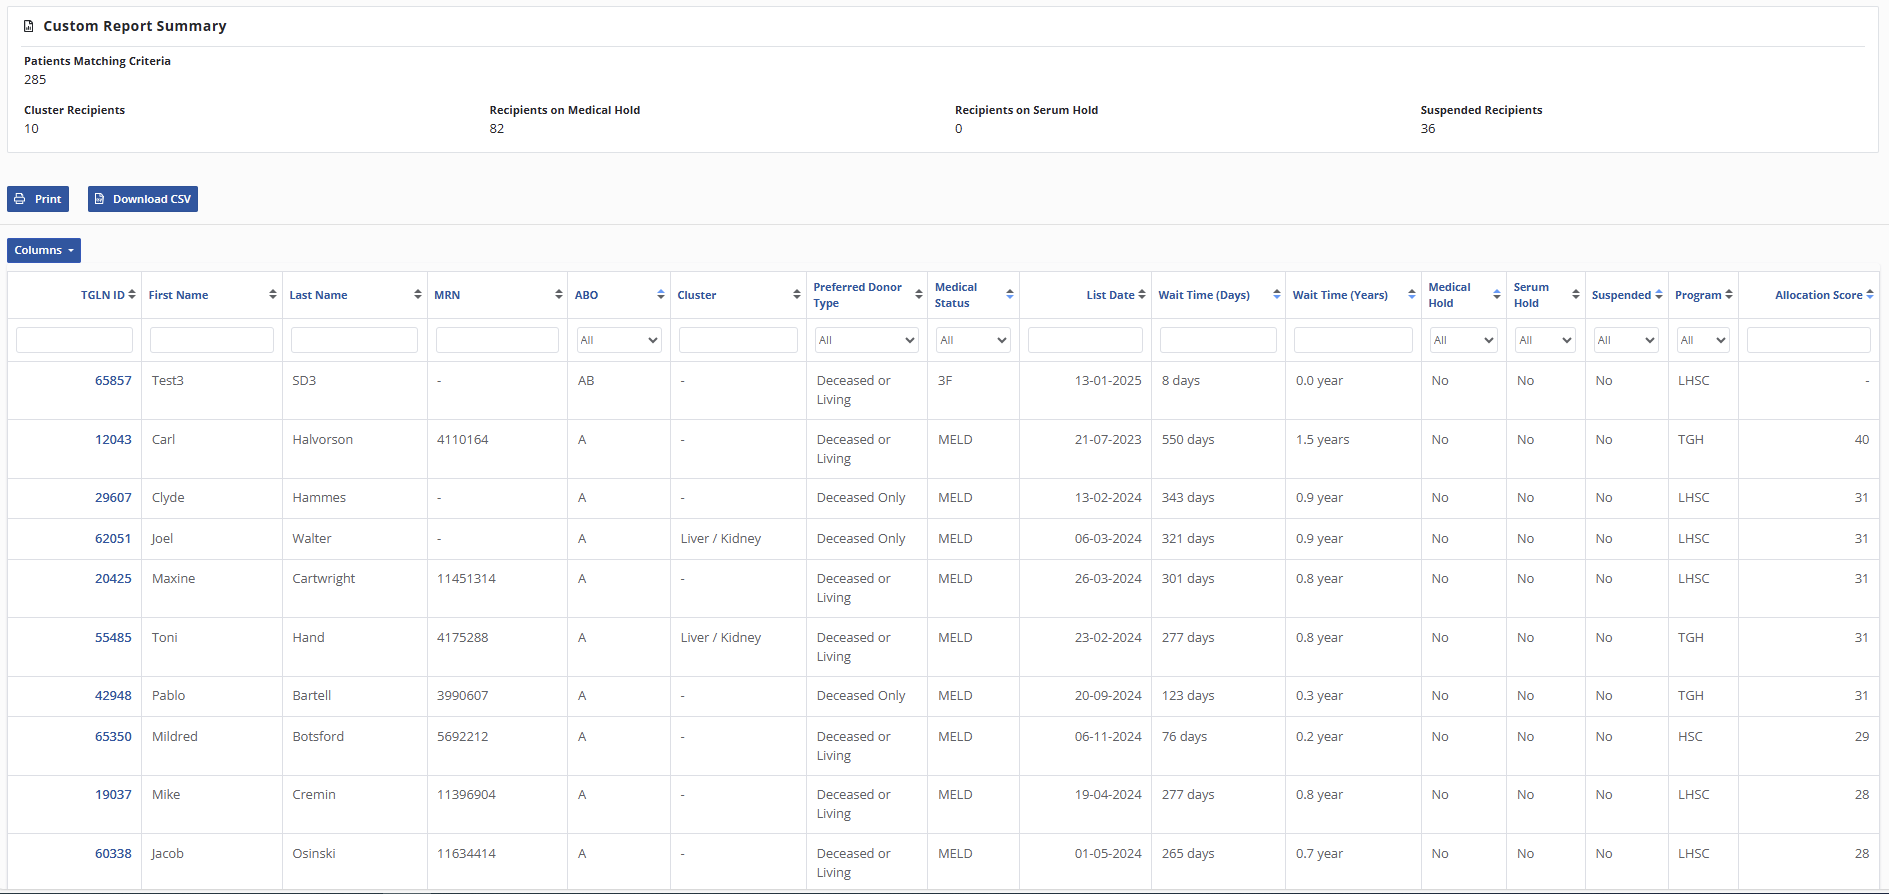
Results Summary: the number of recipients matching the search criteria.
Waitlist Summary: a list of summary information for all recipient profiles matching the search criteria.

Viewing, searching, and filtering the waitlist summary
Results summary
The results summary presents an overview of the total number of recipients matching the search criteria, as well as a breakdown by recipient category (Cluster Recipients, Recipients on Medical Hold, Recipients on Serum Hold, and Suspended Recipients).

Browse the waitlist summary
Scroll through the list.
-
Page through the list:
-
Select the Older or Newer links on the bottom of the list.

-
Select from the Results per page dropdown on the bottom of the list.

-
Customize the waitlist summary
Sort
-
Sort: select a column’s name to sort by that column.
-
e.g. Select Last Name to see the list sorted alphabetically by last name. Select Last Name again to see the names listed in reverse alphabetical order. An arrow next to the column name indicates that the list is sorted by that column.

-
Filter
-
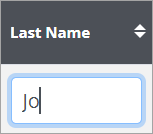
Filter: enter your filter criteria in the blank field below a column’s name to filter the list.
-
To remove the filter, delete what you entered.

-
-
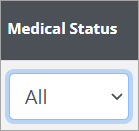
Filter: select a value from one of the dropdown menus to filter the list by that value.
-
To remove the filter, select All from the dropdown.

-
If multiple filters are applied to the list, it displays entries that meet all selected criteria.
Managing waitlist summary columns
Create and save a personalized view of the waitlist summary by choosing which columns to display or hide.
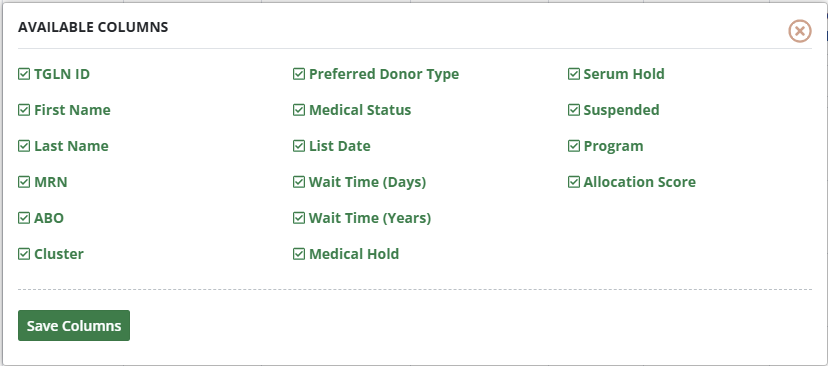
Select the Columns button.
-
The system presents a window of Available Columns.

The options vary, depending on which organ is selected. For example, Allocation Score is an option if liver is selected, while VAD/LVAD columns are available if heart is selected.
Select and deselect the column options as appropriate.
Select the Save columns button.
The recipient list includes only the selected columns.
Viewing a recipient from the summary
Select any row in the report to open that recipient’s profile in a new browser tab.
Printing a waitlist summary
The on-screen waitlist summary can saved as a PDF and then viewed or printed.
Selecting Print will only print the rows currently presented on screen. Use the pagination controls to ensure that the results you wish to print are visible.
Select the number of results per page at bottom of the waitlist summary to control how many rows are on the current view (options are 10, 20, 100, or All rows).
Select the Print button above the waitlist summary.
Follow the on-screen system prompts to save the resulting PDF.
The system saves the current view of the waitlist summary as a PDF. You can use your PC’s file manager tools to open the PDF and then view or print it.
Download a waitlist summary
The waitlist summary can be saved as a CSV file.
Selecting Download CSV will generate a file of all recipients in the customized waitlist summary.
Select the Download CSV button above the waitlist summary.
Follow the on-screen system prompts to save to the resulting CSV file.
The system saves the entire customized waitlist summary. You can use your PC’s file manager tools to open the CSV as a spreadsheet to view, manipulate or print it.
